

In this blog, we will walk you through setting up and testing an Omnichannel voice using Dynamics 365 Customer Service. This will enable you to see how easy it is to enable the Microsoft Digital Contact Center Platform solution into your existing Dynamics 365 Customer Service Enterprise product.
This is just an initial setup. This blog will be part of the series that we will be putting on this site to help our Dynamics 365 community.
We will be using Customer Service admin center canvas app to setup our Digital Contact Center trial environment and we will discuss the following in this blog:
- User setup
- Queue setup
- Workstream setup
- Testing
Navigate to the Power Platform portal (https://make.powerapps.com)
Select the correct environment.
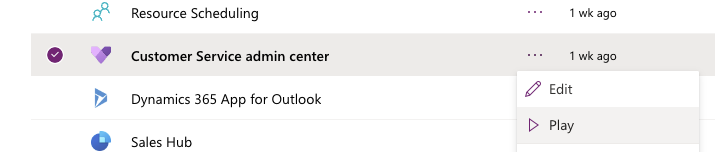
Run Customer Service admin center application.
Users
There are two types of digital contact center users. Depending on which user, you must assign either one of these security roles to use the Omnichannel features:
- Omnichannel Agent
- Omnichannel Supervisor
Follow the steps below to assign roles to your digital contact center users.
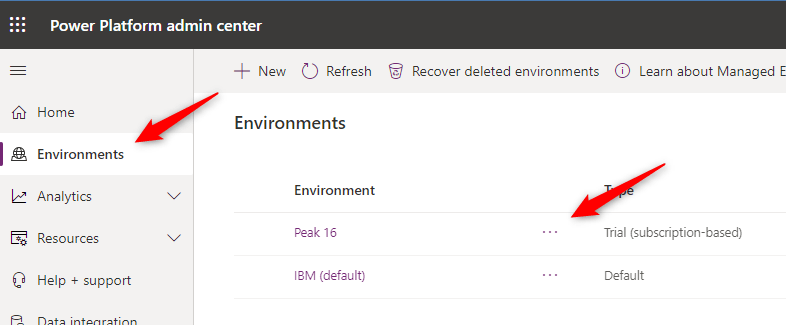
Navigate to Power Platform Admin (https://admin.powerplatform.microsoft.com)
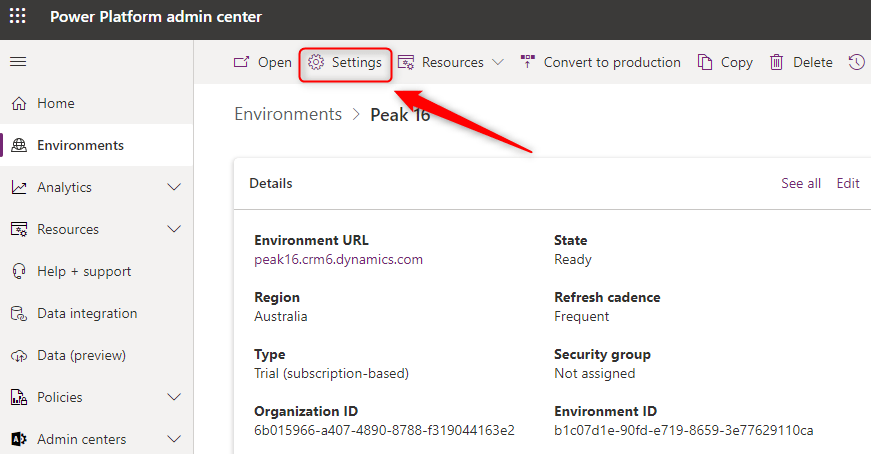
Click the appropriate Dynamics 365 environment for your Digital Contact Center.
Click Settings -> Users + Permissions -> Users

Select the digital contact center user that you want to add roles, click Manage security roles
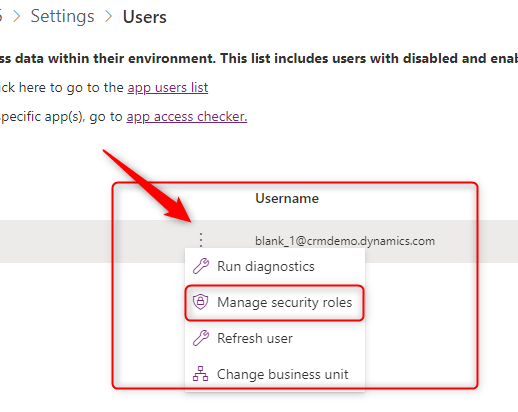
Ensure that Omnichannel agent and/or Omnichannel supervisor roles is checked. Then click Save.
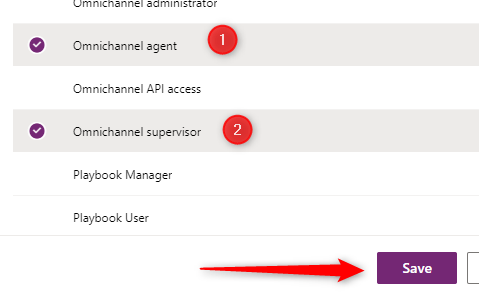
After assigning any of the roles above, the digital contact center user will be visible in the Agent or Supervisor user view.
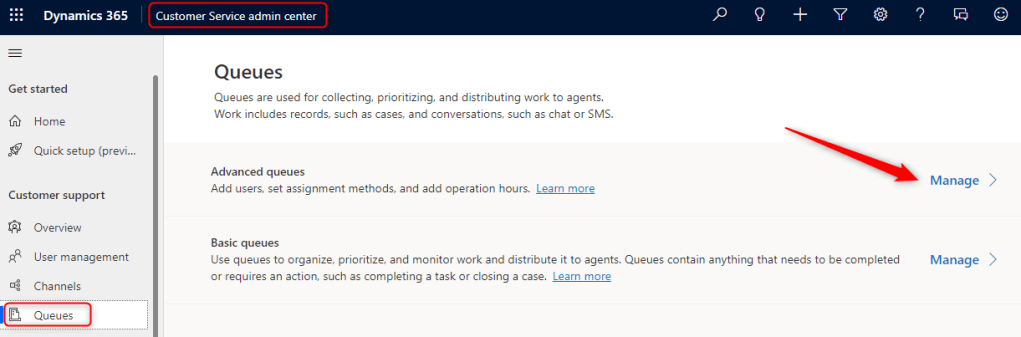
Queues
Queue helps the business to organize and monitor the tasks/work. This is also used to distribute work among digital contact center agents.
Likewise, this will enable the scaling and auto-assignment of incoming work items (voice/chat/email). Each organization must define a queue. Read more on the Overview of unified routing here.
Let’s create a queue for Omnichannel voice.
Navigate back to Customer Service admin center app

Once you have created a queue you must do the following:
- Assign users to the queue
- Assignment method – by default, Round robin is set. You can change the setting to “Highest capacity”. Highest capacity – work items will be prioritized in the order they enter the queue. Among the agents who match skills, presence, and capacity, work will be assigned to the agent with the “most” capacity.
- Overflow conditions – (optional) – you can define a Work item limit, if the number is reached
- Operation hours – (optional), if you want a queue to be active on certain hours, you can define it here (specific/range of days and hours).

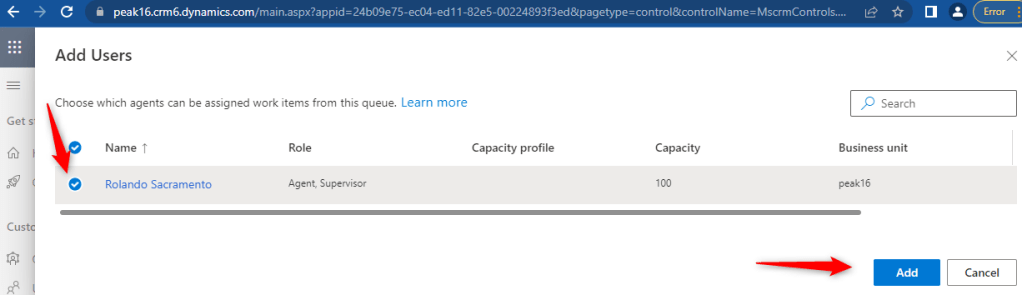
Add users to this queue
To add digital contact center user(s), click + Add users

In the view, only users with either Omnichannel agent or supervisor will show. Select that digital contact center user that you want to add.
Click Add.
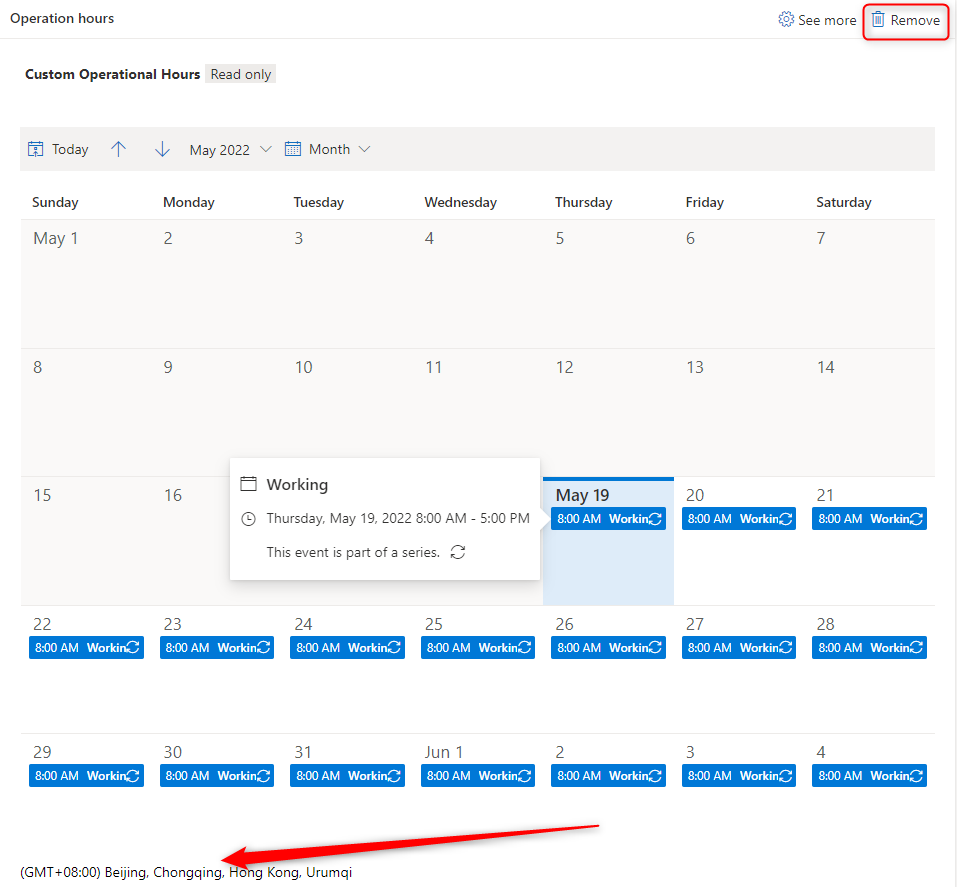
Operating hours
If your digital contact center is operational 24×7 – you do not need to set this up, else you can define the days and hours that the digital contact center is up – agents can receive and answer the inbound calls.
Below is a sample of a custom definition of operation hours. Notice that it defines a starting date, time zone, and dates and times it is active.
You can remove it if not applicable.
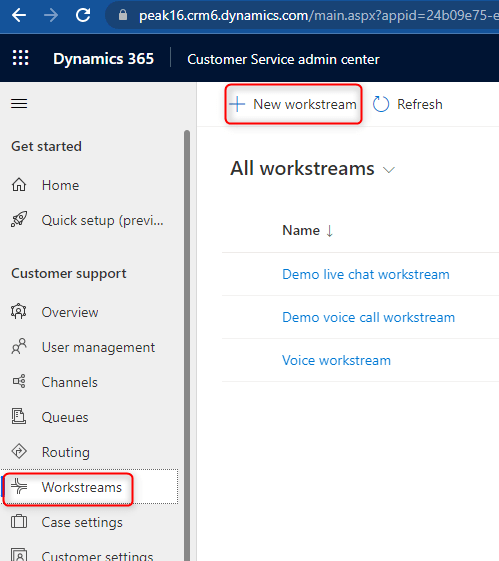
Workstream
It is defined as “…workstream settings will be used to route customers to the right queues and agents”.
The type of queue must be paired with the same type of workstream.
In this case, we select Voice. Notice that we also use the queue we created as the fallback.
To create a work stream for our digital contact center, click Workstream -> + New Stream
Populate an appropriate name and select Voice in the Type field.
In the fallback queue, select IBM Inbound Call Queue. This is the queue we created earlier.
Click Create
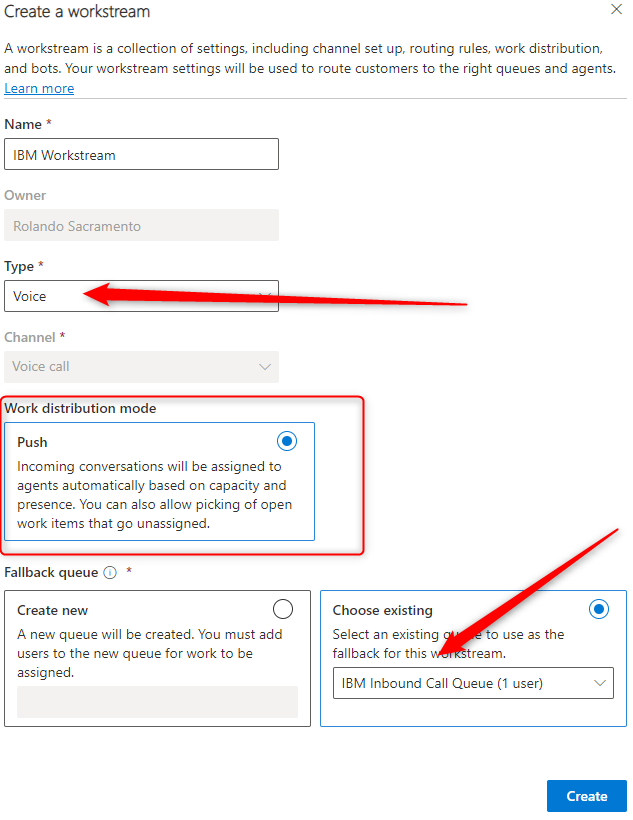
I think the most important concept here is the Work distribution mode – Push. Ensure that you understand it.
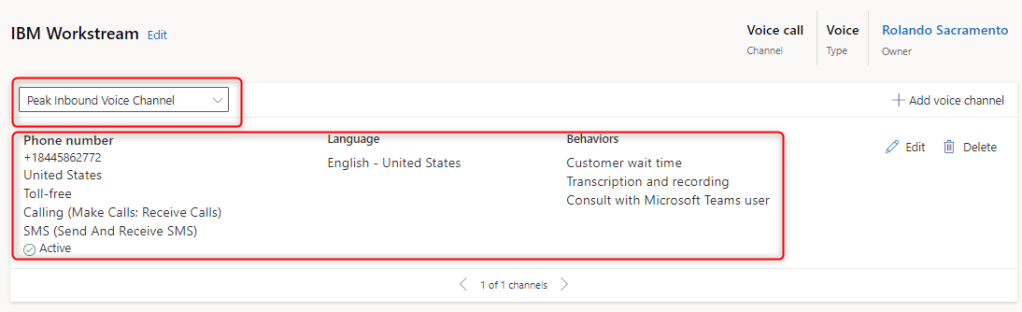
Voice Channel
In the workstream, associate a voice channel by selecting the existing voice channel.
It defines the digital contact center phone number that the customers will call, and how it will behave (wait/hold music, voice profiles, etc..).
Voice setup
To set up a voice channel and associate it to the workstream stream, click Set up voice button

Notice that by default, the type is Voice because this is associated with the workstream that we are trying to configure.
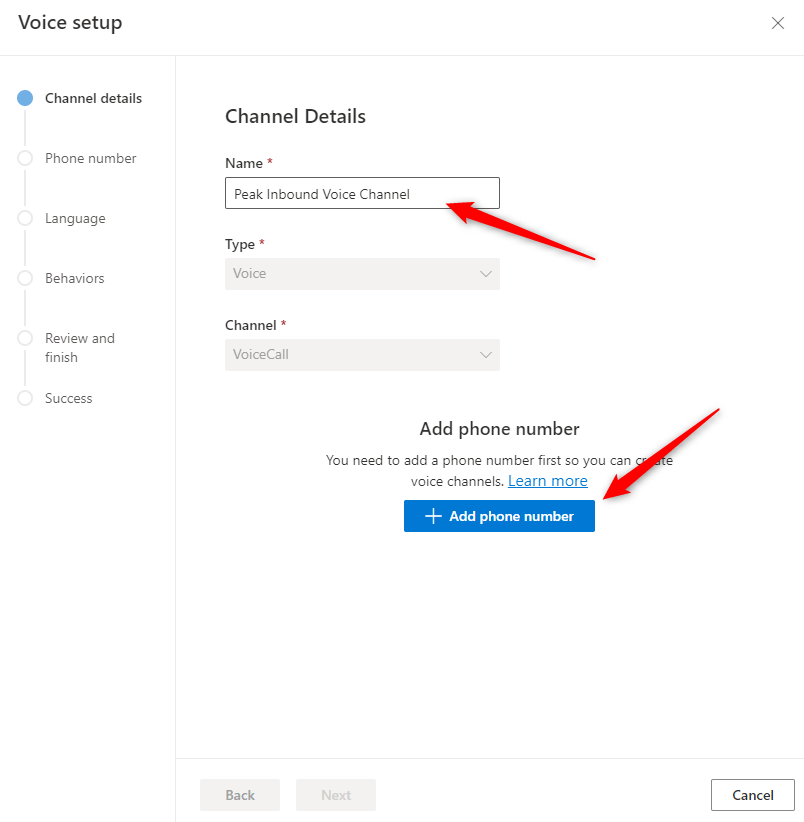
Click + Add phone number, this will redirect you to the Channels -> Accounts -> Phone numbers page.
Add phone number
Notice the message. In the trial environment, you only have 60 to test incoming and outgoing calls. After that, you have to purchase a PSTN number via Azure Communication Services and connect it to your digital contact center voice channel.
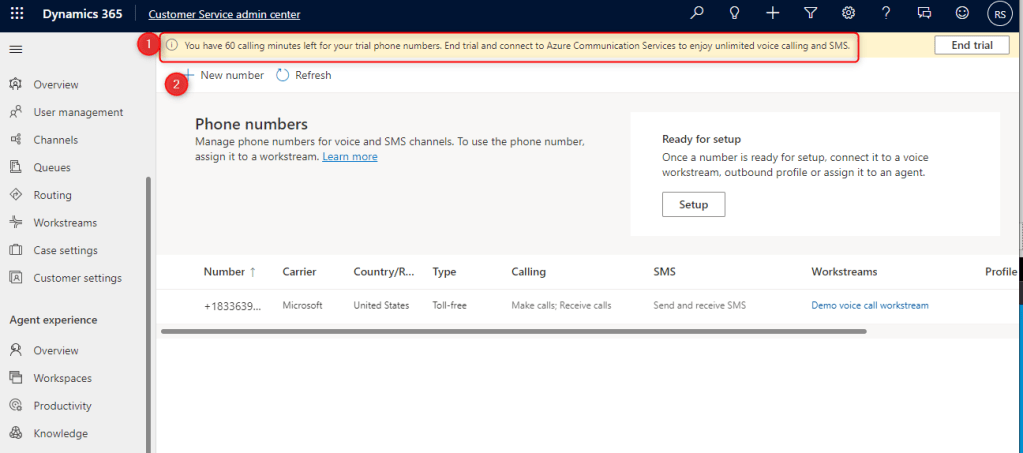
Click New Number.
Select Country/Region (for trial environment, United States is the only option).
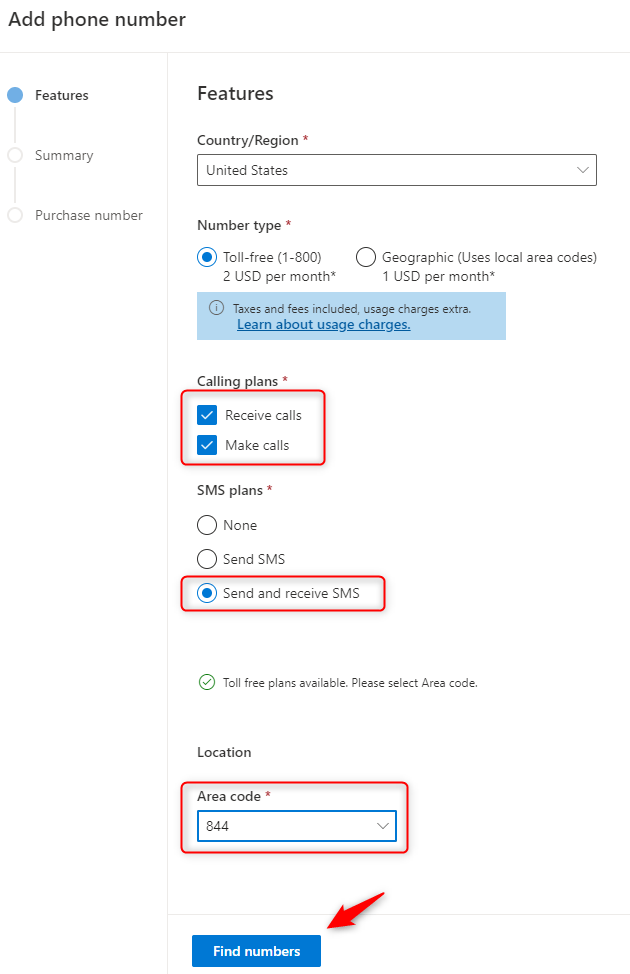
Check the Receive calls and Make calls options.
Select Send and receive SMS.
Select an Area code.
Click Find numbers button
Notice that after a number has been found, you only have 15 minutse to secure that number.

Click Purchase phone number
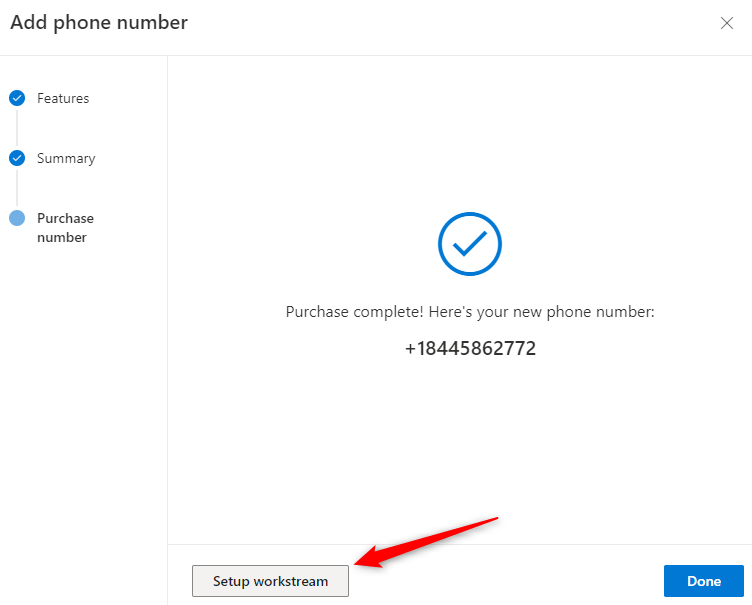
Click Setup workstream. This will redirect you to the workstream page.
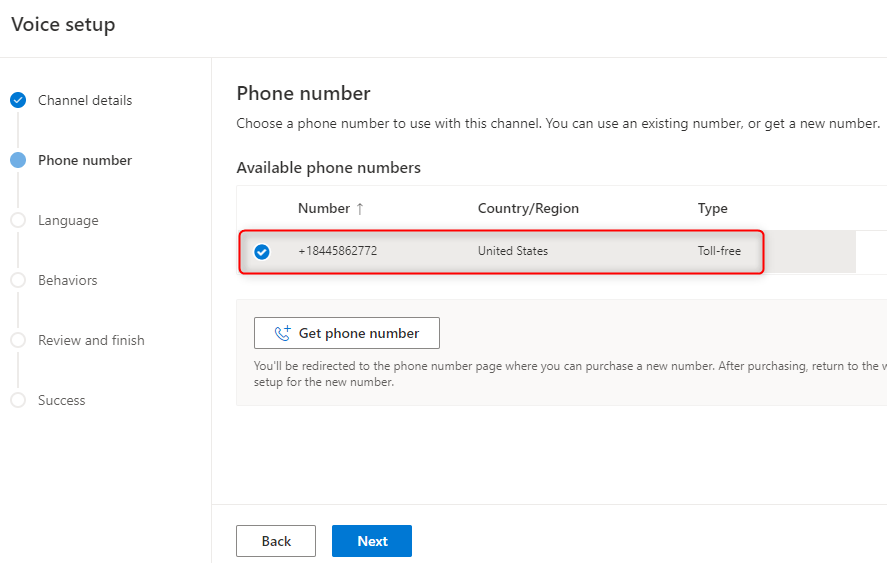
Select the previous workstream that we setup earlier by clicking IBM Workstream

Click Next
Select the number we set up earlier, click Next
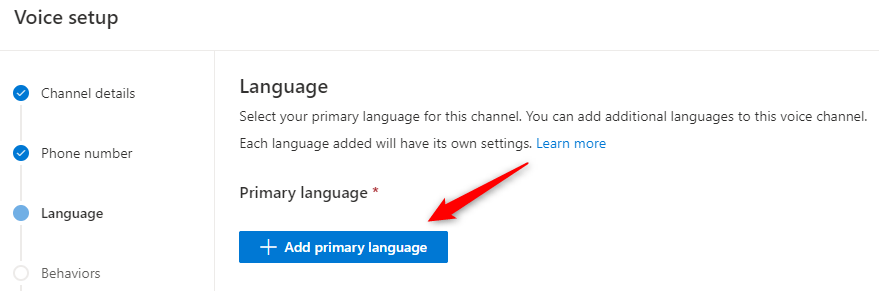
Add primary language is basically a setup to define the following:
- Language – you can select the appropriate language.
- Phone music – you can upload and use a custom hold and wait music.
- Voice profile – you can customize how your AI voice assistant will sound like. AI voice assistant is the sound that the customer hears when they are guided in the process.
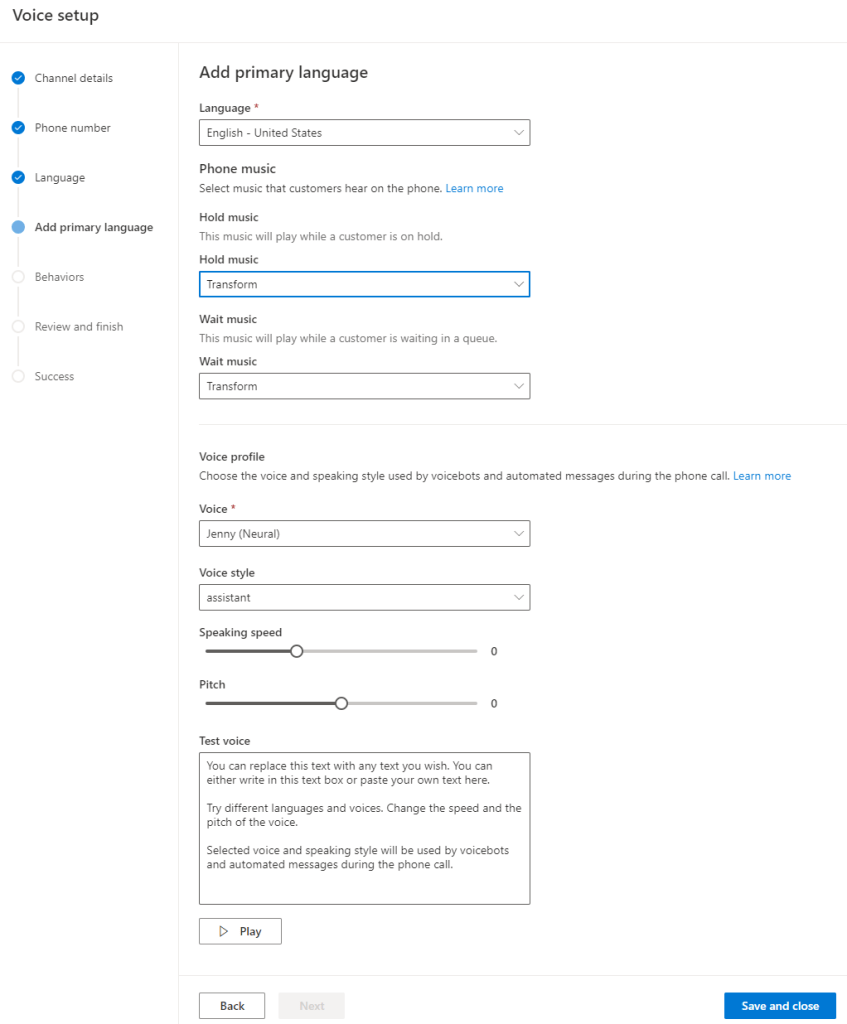
Click Save and close
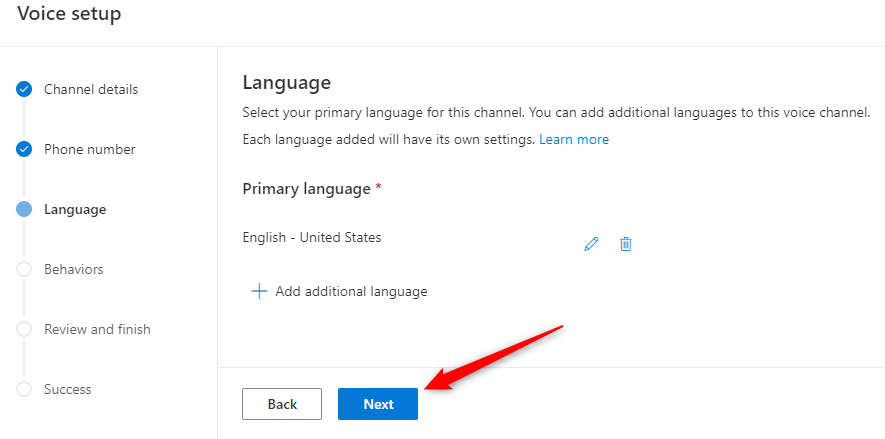
Click Next
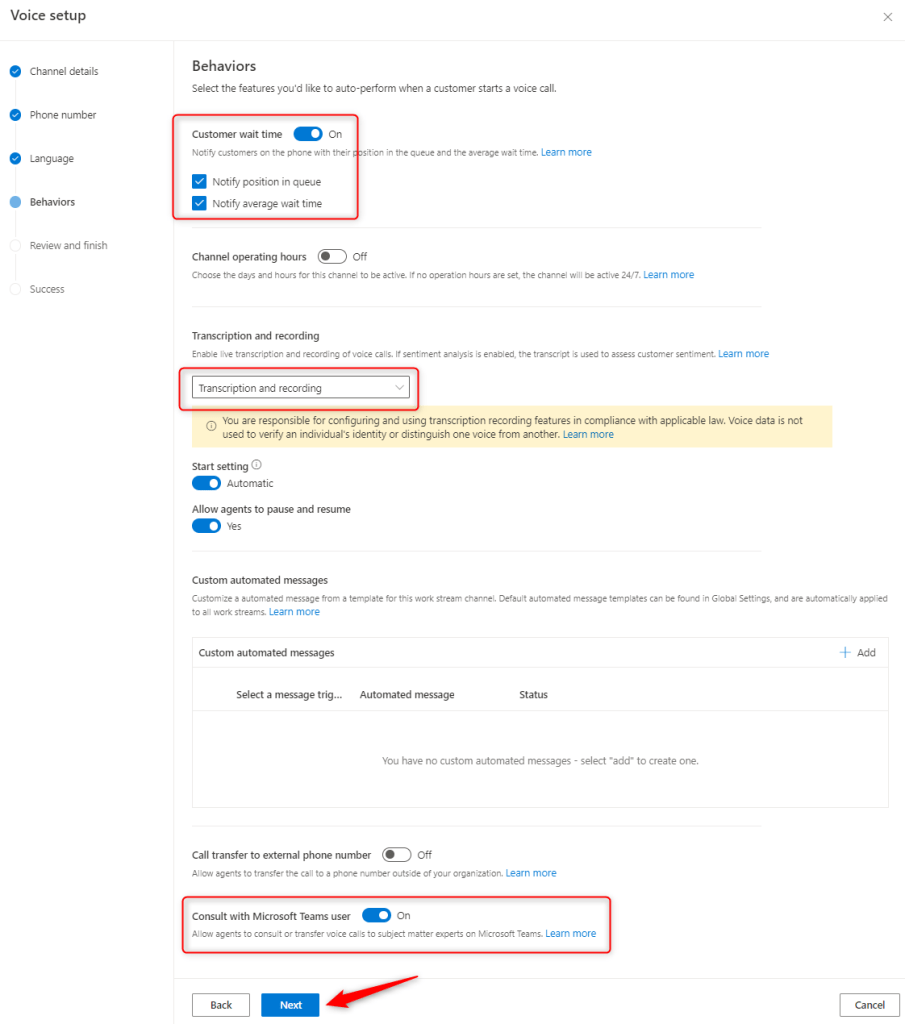
Enable Customer wait time to on.
And check Notify position in the queue and Notify average wait time.
Note that you can choose to enable/disable a transcription and recording.
My favorite – you can enable the Consult with Microsoft Teams user. This allows the agent to talk to their teammates and/or subject matter expert on the subject at hand.
Click Next.

Review the details and click Create Channel.
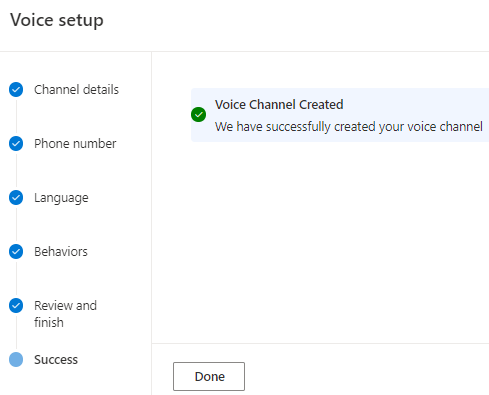
Click Done. This will redirect to the workstream and it is now associated to the voice channel
Testing
At this point – we are now ready to test.
There are two personas in this test scenario – a customer that will call our digital contact center and an agent that will receive the call.
Agent
As an agent is ready to receive calls – they must be using Customer Service workspace canvas app and their status must be set to available, indicated by the green-checked icon.

Customer
As a customer, there are a number of ways to call our digital contact center – in our case, we are using Skype.
The video below is a recording of when I called the number we set up above.
In this video – you will notice the following features:
- Customer’s call notification
- Near real-time transcription
- Real-time sentiment analysis based on the verbatim of the customer.
- Customer information
Note that there is a 60 minutes call trial limit.
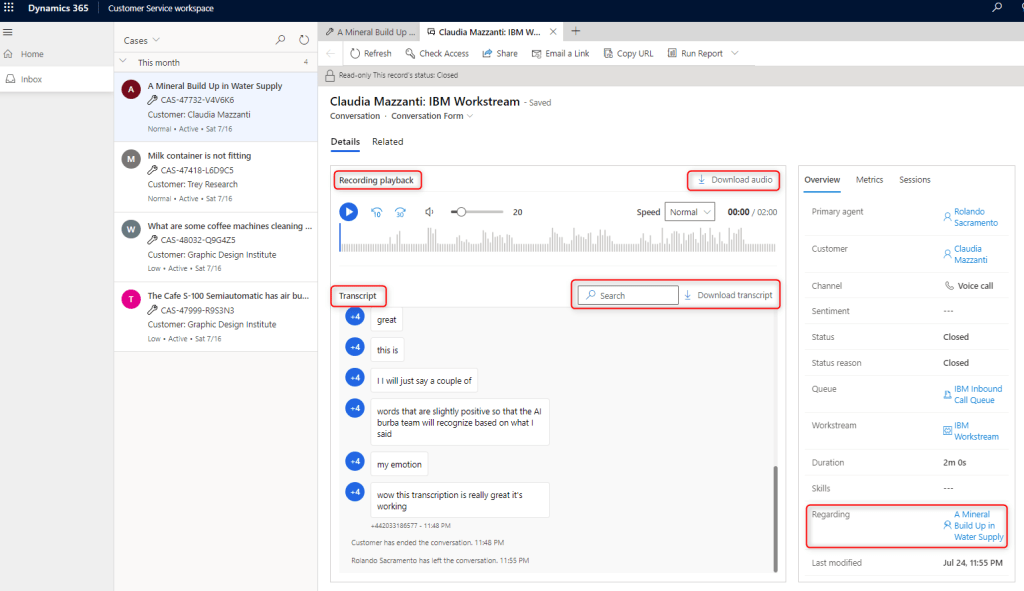
Post call information
After a call is ended, a conversation record is created. In this record, the organization has the following features:
- Audio recording playback
- Download audio
- Transcript recording
- Search and download a transcript
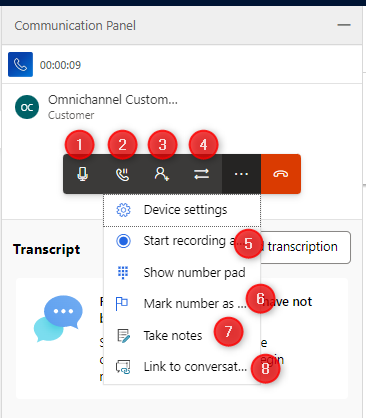
Communication Panel
It is worth highlighting the features of the communication panel.
- Mute
- Pause/Hold
- Consultation – the ability to connect/chat with a team/users while in a call with the customer.
- Ways to transfer the call – the ability to transfer the call to a queue/teams/users.
- Start/pause the recording
- Mark the number as spam
- Create notes
- Link to an existing conversation
This is the end of this blog.
If have any comments/suggestions, please feel free to drop me a message.

Leave a comment