

When I was setting up WhatsApp channel for Microsoft Digital Contact Center Platform (DCCP), it took me a while to figure things out.
So I wrote this blog to contribute Microsoft Digital Contact Center Platform (DCCP) community in setting up WhatsApp channel as a communication stream to Dynamics 365 Customer Service Enterprise.
In this blog we will cover the following:
- Twilio account – highlight the details that you need.
- WhatsApp Channel setup – how to link the Twilio account.
- WhatsApp Workstream setup – how to use and implement WhatsApp channel.
- Testing – to see if everything works.
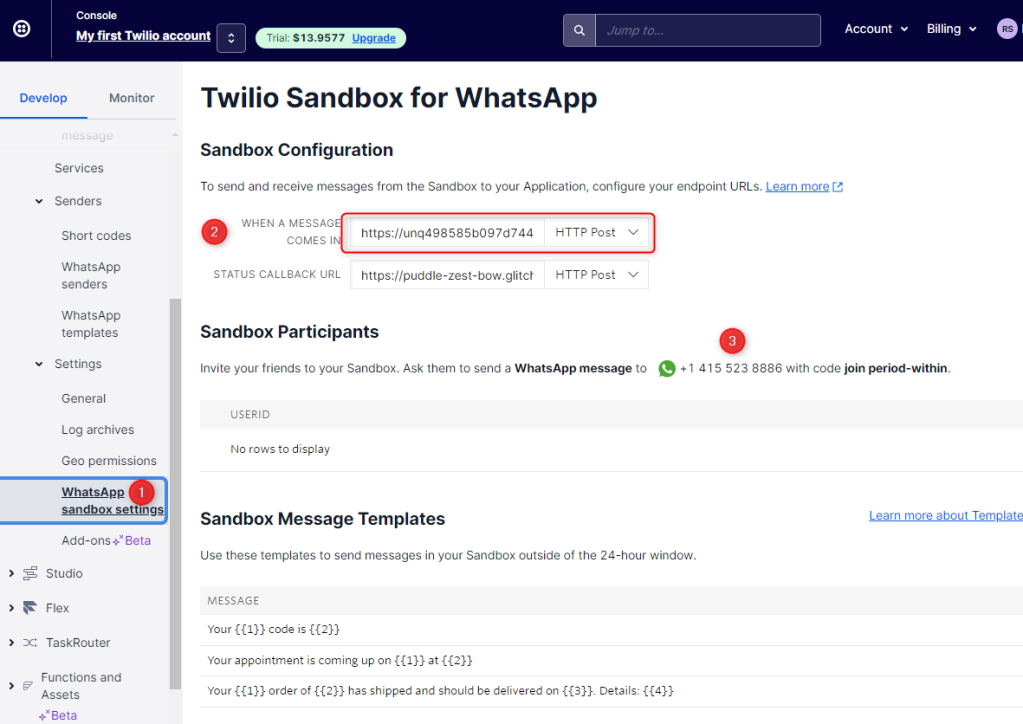
Twilio account
Signed up for Twilio developer account on this link.
Take note of the following Twilio details/fields. You will use these details when you configure WhatsApp channel in Omnichannel Admin Center canvas app.
- Account SID
- Auth Token
- Sandbox Configuration – WHEN A MESSAGE COMES IN (we will update this later).
- Sandbox Participants – WhatsApp number – note the instruction on how to use it. This blog will show you how to use it.

WhatsApp account setup
Below is a step-by-step guide on how to setup WhatsApp account in Omnichannel Admin Center canvas app.
Navigate to Channels -> New account.
Populate Name and select WhatsApp in Channel field. Click Next

Set Account SID and Authentication (Auth) token from Twilio.

Add the Twilio Sandbox Participant – WhatsApp Number.

Click Save.
This will create a Callback URL. Copy this info.

Twilio Update
Navigate to your Twilio console (refer to the earlier steps of this tutorial).
Update the WHEN A MESSAGE COMES IN. Paste the Callback URL from the previous step.
WhatsApp workstream setup
In order for us to use the WhatsApp channel, in our Dynamics 365 Customer Service Enterprise, we need to configure a workstream. This will define how our WhatsApp channel will behave.
Navigate back to Omnichannel Admin Center canvas app.
Click Workstream -> New workstream
Populate the following:
- Name – set an applicable name.
- Type – Message
- Channel – WhatsApp
- Work distribution – Push (default)
- Fallback queue – set to applicable queue.
Click Create.

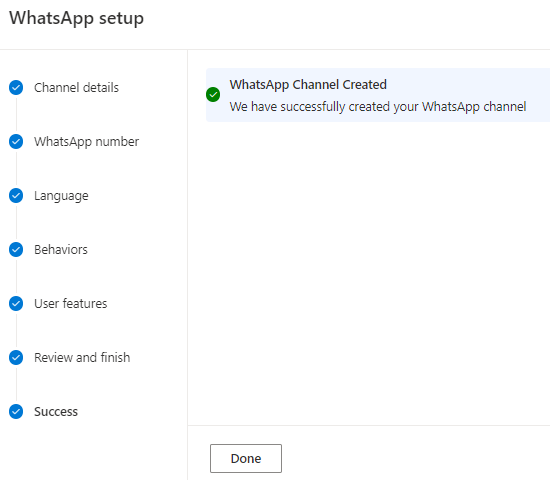
Click Set up WhatsApp.

Set an applicable Name.
Click Next

Select the WhatsApp number that we configure in WhatsApp account setup step.
Note: This will show numbers that are NOT YET associated with a workstream.

Optional – set File attachments to On.
Click Next

Review and click Create channel.

If successful, you will a message below.
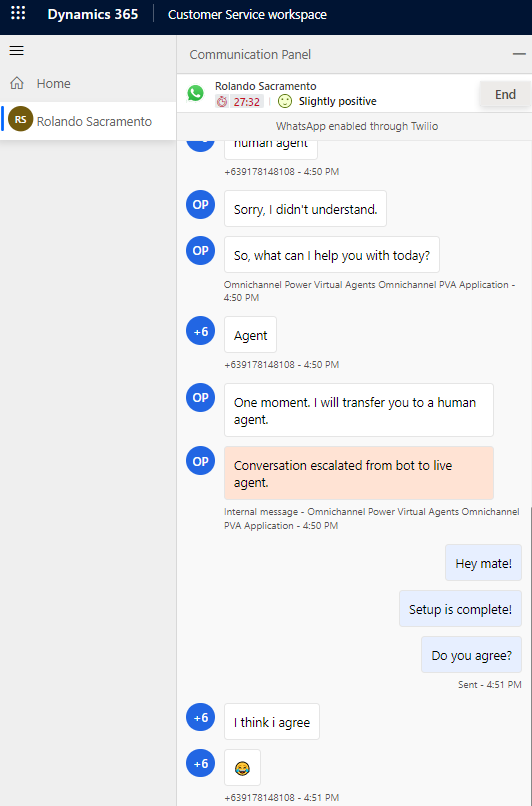
Testing
Now, we’ve already finished our setup. Let’s test it.
In your WhatsApp, create a new contact and save the Sandbox Participants number.

Send a text message JOIN period-within. See reference below.

This will initialize the use of sandbox number.
This will allow you to use this number for 72 hours.
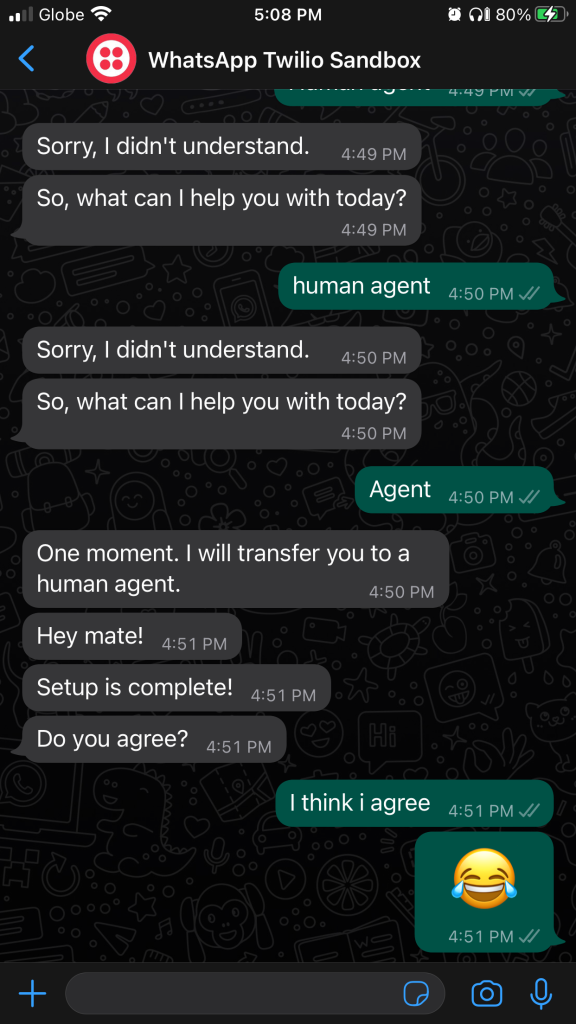
Send a message again to the sandbox number.
This will route the chat to an available agent using the Customer Service Workspace.
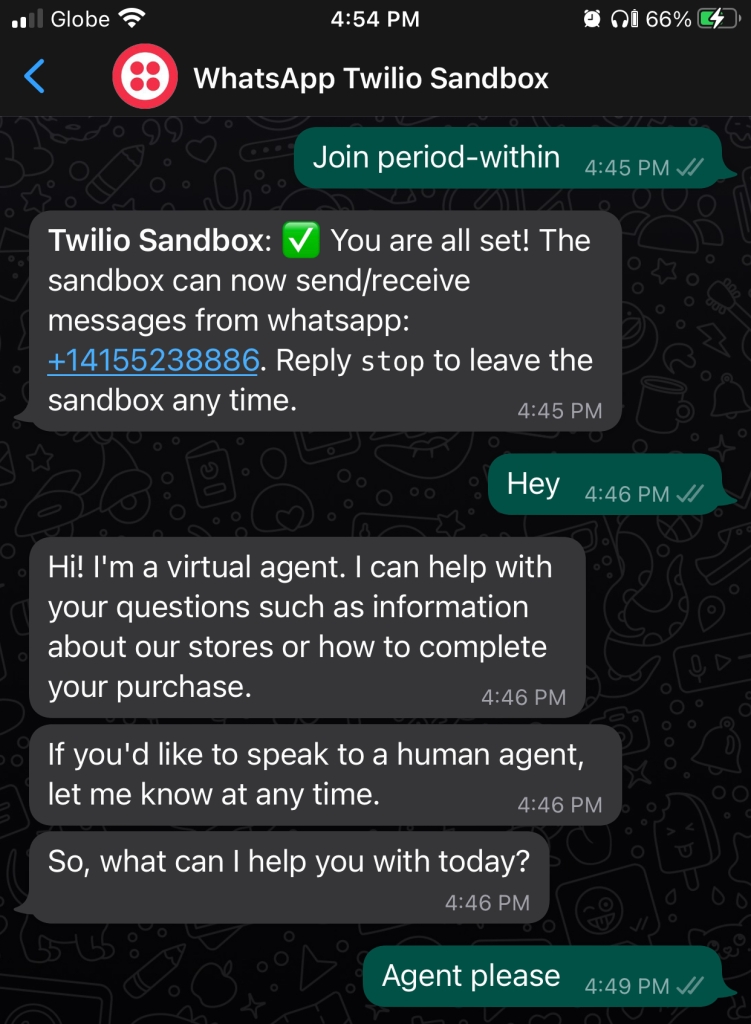

At this point, the agent and WhatsApp user can now “chat”.
Features
Here are some of the features:
- Conversation details – all conversation are recorded. Even the conversation of the user to the bot.
- Real-time customer sentiment analysis
- Conversation summary

Testing complete! ^_^
If you have questions/clarifications – I’m happy to collaborate and update the information in this blog.

Leave a comment